How to mount liquid cooler?
I know many builders feel nervous when they prepare to mount a liquid cooler. The parts look complex and the steps look easy to get wrong.
You can mount a liquid cooler by matching the right brackets, setting the pump in a safe place, placing the radiator in a stable position, and tightening all screws in an even order. This keeps the cooler safe and steady.
I want to share my full method, so you can feel calm and clear when you start your build.
What mounting brackets are typically required?
Many first-time builders feel confused when they see many small brackets and screws inside the cooler box. The different shapes create pressure and doubt.
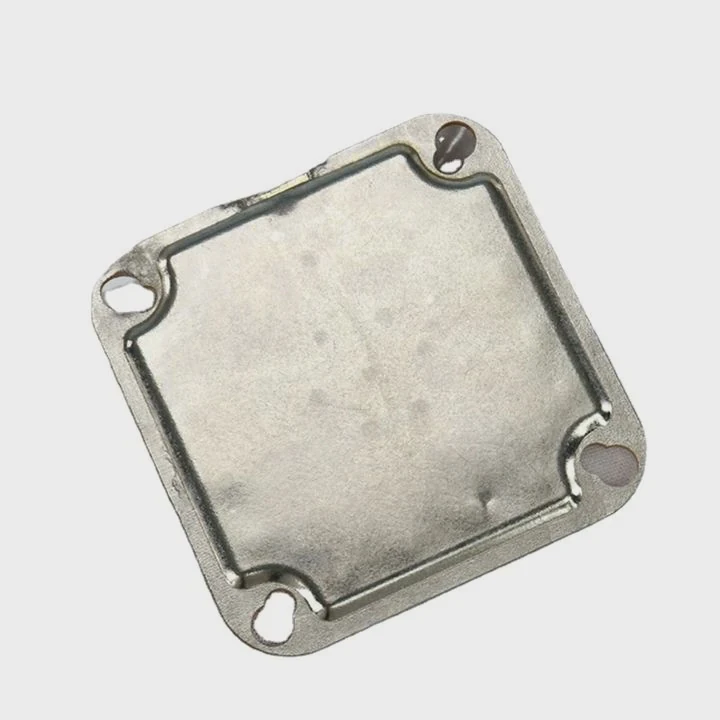
You need a backplate, standoffs, a pump mounting ring, and the correct CPU-specific brackets to mount a liquid cooler in a stable way. These parts hold the pump block tight and support the radiator.
I often start by sorting all brackets on my table. This makes the build easier. I also match each bracket with the correct CPU type. I do this before I add thermal paste, because the paste can get messy if I need to change parts later. I want every step to feel clean and simple.
Key Bracket Types
Here is a simple table that shows the brackets I check before mounting:
| Bracket Type | Main Use |
|---|---|
| Backplate | Supports CPU pressure from the rear |
| Standoffs | Lift the pump block above the socket |
| Mounting Ring | Holds pump block to standoffs |
| Intel/AMD Brackets | Fit the shape of each CPU socket |
Why these brackets matter
Each bracket keeps the pump block in a fixed position. The backplate spreads pressure across the motherboard. Standoffs keep the pump block at the correct height. The mounting ring locks the pump in place. The CPU-specific brackets match the socket holes. When all parts line up, the cooler sits flat and safe.
My build habit
I always check the case layout before I install the backplate. Some cases have tight space near the motherboard tray. I sometimes remove the board for easier mounting. This makes the whole process smoother and avoids scratching the case.
Steps I follow
- Pick the correct bracket set
- Attach the backplate
- Add standoffs on the front side
- Lock the pump ring in place
- Confirm all holes line up
This method keeps the setup clean and avoids mistakes.
Why must pump orientation be considered?
Some builders mount the pump block in any direction because they think the pump will work as long as it touches the CPU. But the orientation affects tube routing, noise, and long-term stability.
Pump orientation must be considered because the pump should stay lower than the highest point of the loop. This keeps air away from the pump and helps the system stay quiet and cool.
I made this mistake years ago. I placed the pump facing sideways and the tubes bent in a sharp curve. After a few days, I heard a soft gurgle. The temperature jumped fast. That build taught me that pump orientation shapes airflow, pressure, and tube comfort. I changed my habit after that.
Key Orientation Rules
1. Pump should not be the highest point
Air rises. If the pump is high, air moves into it. The pump becomes loud and weak.
2. Tubes must be free from bending
Sharp curves slow the flow. The pump works harder. The liquid takes longer to move heat.
3. Radiator position affects pump height
Top-mounted radiators need tubes pointing down. Front-mounted radiators work well when the tubes sit at the bottom.
Orientation Notes I Use
Here is a simple table I reference when I explain orientation to new builders:
| Orientation Rule | Reason |
|---|---|
| Pump lower than radiator | Air stays away from pump |
| Tubes not stretched | Less strain and better flow |
| Radiator bleed area at top | Air collects in safe place |
| Tubes avoid fan blades | Prevents wear and noise |
My deep method for safe orientation
When I set pump orientation, I start by placing the radiator inside the case. I move the tubes gently to see how they fall. I look for a natural curve that does not stretch. I check the pump plate to make sure the logo is upright or sideways. The direction does not matter for cooling, but it makes cables easier to route.
Then I check the pump height. I compare the pump position with the radiator top. If the pump sits too high, I change the radiator location. I always choose a setup that keeps the pump low. This protects the pump body and stops air from entering.
I also check the case airflow. Pump cables should not block air. Tubes should not touch hot parts. I try to keep space around the pump, because a clean layout keeps the loop cool and easy to maintain.
These steps take time, but they make the system safer and quieter.
Where should radiator screws be tightened?
Many builders tighten radiator screws without thinking. Some tighten only one corner. Some over-tighten the screws. These mistakes bend fins and hurt cooling.
Radiator screws should be tightened through the fan holes into the radiator frame in an even cross-pattern. This keeps pressure balanced and prevents damage to the fins.
I learned this when I saw a customer push long screws into the radiator. The screws pierced the liquid channels. The cooler leaked. I had to replace the whole unit. Since that day, I always explain screw length and pressure.
My screw-tightening method
1. Start with two corners
I place the radiator in its mount. Then I add the first screw by hand. I avoid tools at first. I add a second screw on the opposite corner to stabilize the unit.
2. Use a cross pattern
I tighten in an X shape. This keeps the radiator frame flat and avoids twisting.
3. Keep the pressure soft
I use light turns. I stop when the screw feels snug. Radiators are thin. Too much pressure can crush the fins.
Extra notes I share with builders
- Use the screws that came with the cooler
- Do not use long case screws
- Keep screws aligned with fan holes
- Stop when the screw feels firm
Deep guidance from my builds
When I work with large radiators, I hold the radiator with one hand and tighten with the other. I check fan edges to make sure they sit flat. If the fan tilts, it makes noise later. I always rotate the fans before tightening fully. If the fan rubs against its frame, the alignment is wrong.
I also check the radiator mount of the case. Some cases have thin metal. If the screw goes in at an angle, the metal bends. This hurts airflow. I straighten the panel before tightening. This helps the fans keep the right distance from the radiator.
Radiator screws seem simple, but careful tightening protects the cooler and keeps the system quiet.
Can poor mounting reduce cooling efficiency?
Many builders think any mount will work. But cooling needs tight pressure, clean surface contact, and correct bracket alignment.
Poor mounting reduces cooling efficiency because uneven contact and loose brackets create gaps between the cold plate and CPU. Heat cannot move out fast enough.
I often test systems for customers. Many cases show high temperature and loud noise. The cooler looks fine from the outside, but the mount is wrong. The pump sits crooked. The bracket sits loose. The pressure is uneven.
Key signs of poor mounting
1. CPU heats fast under simple tasks
The cooler cannot pull heat away.
2. Pump sounds louder
It works harder because heat stays near the plate.
3. Temperature jumps in a few seconds
This shows bad contact.
How I fix these cases
I remove the pump block. I clean the paste with alcohol. I add a small dot of fresh paste. Then I place the pump block flat on the CPU. I tighten screws in a cross pattern. I check bracket alignment. Then I test again.
Deep explanation from my repair work
I have seen many builds where the paste layer was too thick. Thick paste slows heat flow. I always use a small amount. I also check the cold plate. If dust sits on the plate, the mount becomes weak. Dust acts like a barrier.
I also check the bracket size. Using the wrong bracket tilts the pump. Even a small tilt creates a large gap on one side. This raises temperatures by a big margin. I fix this by picking the correct bracket and repeating the mount.
I test the system after each fix. When the mount is correct, the CPU temperature drops fast. The pump becomes quiet. The radiator becomes warm. This shows the cooler pulls heat correctly.
A good mount makes the whole system stable and efficient.
Conclusion
A liquid cooler works best when the brackets fit right, the pump orientation stays safe, the radiator screws stay even, and the mount sits flat. When each step is done with care, the cooling stays strong and stable.
TAGS
Latest Articles

Volume discount levels for heat sink orders?
Buyers often ask when heat sink prices start to drop with volume. Many worry they’re overpaying for small orders. This guide explains how B2B volume pricing works for thermal components. Heat sink
21 Dec,2025
Heat sink long-term supply contract options?
Many buyers want stable pricing and reliable delivery for heat sinks. But without a clear contract, risks grow over time. This article explores how to secure better long-term supply deals. Long-term
21 Dec,2025
Tooling cost for new heat sink profiles?
Many engineers struggle to understand why tooling for custom heat sinks costs so much. They worry about budgeting and production timelines. This article breaks down the cost drivers behind tooling.
21 Dec,2025
Heat sink custom sample process steps?
Sometimes, starting a custom heat sink project feels overwhelming—too many steps, too many unknowns, and too many risks. You want a sample, but not endless delays. The process for requesting and
20 Dec,2025
Standard B2B terms for heat sink payments?
When buyers and sellers in B2B heat sink markets talk about payment, many don’t fully understand what’s standard. This can lead to delayed orders, miscommunication, and even lost business
20 Dec,2025
Heat sink pricing factors for large orders?
Heat sinks are vital for many systems. When prices rise, projects stall and budgets break. This problem can hit teams hard without warning. Large order heat sink pricing depends on many factors. You
20 Dec,2025Related Articles
- what is better air cooled or liquid cooled?
- How to install AIO liquid cooler?
- Where to install liquid CPU cooler?
- Does liquid cooler need water?
- Which Is Better Air Cooled or Liquid?
- How to Set Up Liquid Cooler?
- Heat Sink Manufacturer in Seychelles
- Heat Sink Manufacturer in Slovakia
- Heat Sink Manufacturer in Slovenia
- Heat Sink Manufacturer in Solomon Islands
- Heat Sink Manufacturer in Somalia
- Heat Sink Manufacturer in South Sudan
Author
Dr. Emily Chen
Chief AI Researcher
Leading expert in thermal dynamics and AI optimization with over 15 years of experience in data center efficiency research.
Categories
Latest Products


Recommend Categories
- Liquid cooling plate Manufacturer
- Industrial Heat Sink Manufacturer
- Standard Heat Sink Manufacturer
- Aluminum Heat Sink Manufacturer
- Copper Heat Sink Manufacturer
- Anodized Heatsink Manufacturer
- Stamping heat sink Manufacturer
- Die Casting Heatsink Manufacturer
- Soldering heat sink Manufacturer
- CNC Parts Manufacturer
Latest Products
- Wholesale Aluminum Radiator
- Water Cooling Plate Kit
- Water Cooling Heat Sink
- Water Cooling Heat Sink Kit
- Stainless Steel Water Distributor
- Server Water Cooling Plate Kit
- Server Liquid Cooling System
- Server Aluminum Cooling Kit
- S19 Full Cover Cooling Plate
- S19 Cooling Plate Kit
- S19 Aluminum Cooling Plate
Contact Expert
Have questions about this article? Reach out to our experts directly.