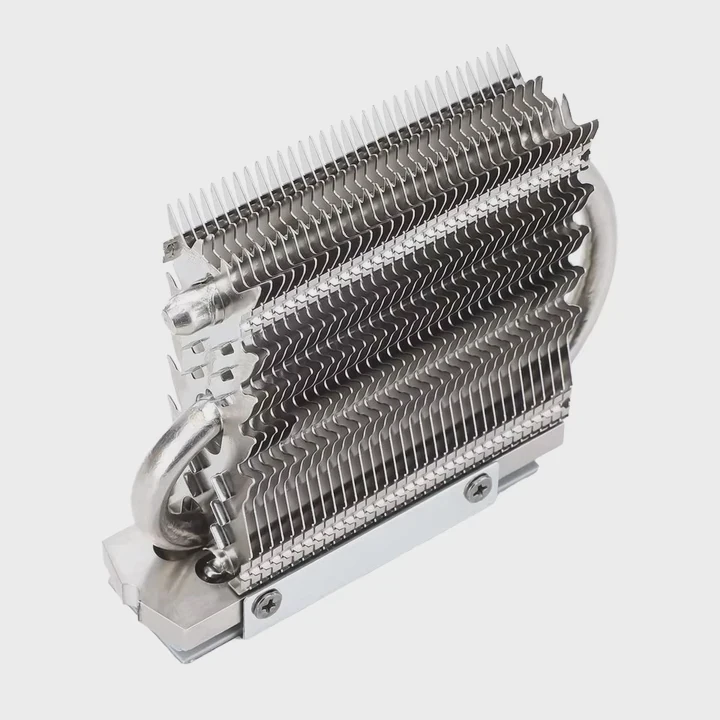
how to install heatsink and fan into a cpu?

I remember my first cooler mount. I rushed the steps, left old paste on the heat spreader, and watched temps spike the moment I ran a stress test.
You install a heatsink and fan by cleaning the contact surfaces, applying a small paste amount, placing the cooler evenly, tightening screws in a cross pattern, and routing cables away from RAM. This gives safe pressure and steady temps.
I want to show you these steps in simple words so you avoid the mistakes I made.
Why clean surfaces before mounting?
I once skipped the cleaning step because I thought old paste was “good enough.” It was not. My cooler sat on dry paste lumps, and the CPU overheated in minutes.
You must clean surfaces because old paste, dust, and oils block metal contact. Clean metal helps the new paste spread evenly and move heat fast.
The CPU heat spreader and cooler base work like two flat plates. Paste fills small gaps, but it cannot fix dirt or dry layers. When dirt stays, heat moves slower.
H3: What happens if you skip cleaning
I tested this once on purpose. I left dry paste and fingerprints on the CPU. The cooler sat unevenly. Temps rose fast. The fan grew loud. The old paste acted like insulation.
H3: How I clean surfaces now
I use isopropyl alcohol and a lint-free cloth. I wipe the CPU in straight lines. I clean the cooler base the same way. I make sure both look shiny and smooth. This takes less than a minute and makes a big difference in heat transfer.
Cleaning results table
Here is a table that shows how surface condition affects temps:
| Surface State | Contact Quality | Expected Temp |
|---|---|---|
| Clean metal | Strong | Lower |
| Light smudges | Medium | Higher |
| Dry paste chunks | Poor | Very high |
Why this step improves stability
A clean surface keeps temps steady. When paste spreads on smooth metal, the layer stays thin. A thin layer moves heat faster. This gives quieter fans and longer part life.
H3: What I learned from mistakes
I learned that skipping cleaning looks fast but makes work slow later. When I clean well, I mount once. When I skip, I re-mount twice. Clean surfaces save time and stress.
How much paste ensures good contact?
I once used far too much paste because I feared gaps. The paste spilled at the edges. It made the mount messy and slowed heat transfer.
A pea-sized dot of paste gives the best contact. It spreads thin under pressure and fills small gaps without blocking heat.
Paste is not glue. It is not better in large amounts. It works best when used as a thin layer between the CPU and cooler.
H3: Why small amounts work best
The cooler presses the paste across the metal. This motion spreads the paste to the edges. If you start with too much, you get a thick layer. A thick layer slows heat transfer. A thin layer moves heat faster.
H3: Shapes that also work
I tried line and cross patterns. They work for long, narrow CPUs. But for most square heat spreaders, a pea-sized dot in the middle gives even spread. It covers the whole surface without waste.
Paste behavior table
Here is a table that shows how paste amount changes the outcome:
| Paste Amount | Spread | Contact | Cooling |
|---|---|---|---|
| Too little | Patchy | Weak | Poor |
| Pea-sized | Even | Strong | Good |
| Too much | Thick | Poor | Weak |
H3: How I check if the amount is right
When I suspect I used too little or too much, I lift the cooler gently and check the spread. If I see even coverage with no bare spots, I remount with confidence. This “test mount” saved me many times.
Why this helps new builders
Many new builders fear gaps. They think paste must cover the whole CPU before mounting. But the cooler does that job. Once this idea is clear, the process becomes simple and clean.
Can fans be oriented wrong?
I once mounted a fan the wrong way. The cooler ran but blew hot air back toward the motherboard. Airflow collapsed. Temps rose. I learned to check fan direction each time.
Yes, fans can be oriented wrong. A fan must push air through the heatsink fins and toward the exhaust path. Wrong direction traps heat and makes cooling weaker.
Fans have an intake side and an exhaust side. Airflow matters because the heatsink removes heat only when air moves through its fins.
H3: How to read fan direction
Most fans have small arrows on the frame. One arrow shows blade rotation. One arrow shows airflow. If these arrows are missing, I check the open side of the fan frame. Air enters on the open side and exits on the side with support bars.
H3: What bad orientation does
Bad orientation causes the cooler to recycle hot air. It also fights the case airflow. When case fans push air out, and the CPU fan pushes air the wrong way, hot zones form.
Airflow examples table
Here is a simple table that shows good and bad airflow setups:
| Orientation | Air Direction | Result |
|---|---|---|
| Front to back | Toward exhaust | Strong cooling |
| Back to front | Against exhaust | Weak cooling |
| Bottom to top | Toward top vents | Good in tower cases |
H3: What I learned during tests
I mounted a fan backward and ran a stress test. Temps jumped by more than 10°C. When I flipped the fan, temps dropped right away. This taught me that fan direction is as important as paste and pressure.
Why airflow is simple once you understand it
Air should flow in one path. When all fans follow the same direction, heat leaves the case fast. This keeps CPU coolers more stable and makes the system quiet.
Should cables avoid RAM slots?
I once tucked my cooler’s fan cable across a RAM slot. The PC worked but upgrading RAM became hard. I moved the cable and learned a cleaner method.
Yes, cables should avoid RAM slots. Cables over RAM make upgrades hard, block airflow, and risk loose contacts. Good cable routing keeps the area clear.
Cooler fan cables are thin, but they can still block RAM clips or press against heat spreaders. Clean cable paths improve airflow and make future work easy.
H3: Why cables cause problems
When a cable hangs across a RAM slot, it may stop the latch from opening fully. It may rub against RAM heat spreaders. In tight builds, it may force the cooler fan to sit crooked.
H3: My simple routing method
I run the fan cable around the edge of the cooler. I tuck it behind the heatsink. I aim for the nearest fan header on the motherboard. If the cable is long, I loop it gently and tie it with a small zip tie.
Cable risk table
Here is a table that shows how cable placement affects build quality:
| Cable Path | RAM Access | Airflow | Safety |
|---|---|---|---|
| Over RAM slots | Poor | Weak | Low |
| Along cooler edge | Good | Good | High |
| Behind cooler | Good | Good | High |
H3: Why cable order matters
I connect the fan cable before placing the cooler down. This gives more space to reach the header. When I skip this step, I often struggle to reach the header later, especially in tight cases.
H3: What I learned from bad cable paths
I once placed a cable between two RAM sticks. It fit but pressed against one stick. After a few hours, the PC restarted due to a loose RAM contact. After I moved the cable, the system ran fine. This showed me that cable pressure can affect RAM stability.
Conclusion
A safe heatsink and fan installation needs clean surfaces, the right paste amount, correct fan direction, and clear cable paths. These small steps give strong contact, smooth airflow, and stable temps for long-term use.
TAGS
Latest Articles

Volume discount levels for heat sink orders?
Buyers often ask when heat sink prices start to drop with volume. Many worry they’re overpaying for small orders. This guide explains how B2B volume pricing works for thermal components. Heat sink
21 Dec,2025
Heat sink long-term supply contract options?
Many buyers want stable pricing and reliable delivery for heat sinks. But without a clear contract, risks grow over time. This article explores how to secure better long-term supply deals. Long-term
21 Dec,2025
Tooling cost for new heat sink profiles?
Many engineers struggle to understand why tooling for custom heat sinks costs so much. They worry about budgeting and production timelines. This article breaks down the cost drivers behind tooling.
21 Dec,2025
Heat sink custom sample process steps?
Sometimes, starting a custom heat sink project feels overwhelming—too many steps, too many unknowns, and too many risks. You want a sample, but not endless delays. The process for requesting and
20 Dec,2025
Standard B2B terms for heat sink payments?
When buyers and sellers in B2B heat sink markets talk about payment, many don’t fully understand what’s standard. This can lead to delayed orders, miscommunication, and even lost business
20 Dec,2025
Heat sink pricing factors for large orders?
Heat sinks are vital for many systems. When prices rise, projects stall and budgets break. This problem can hit teams hard without warning. Large order heat sink pricing depends on many factors. You
20 Dec,2025Related Articles
- how do i reuse a heatsink on a cpu?
- do laptop ssd need heatsink?
- does the adata xpg sx8200 pro 1tb need a heatsink?
- Where is the heatsink on the motherboard?
- what size are intel cpu heatsink screws?
- will adding aluminum heatsinks to xbox 360 help it reddit?
- can you boot skylake without heatsink?
- how to put heatsink on cpu?
- how to mount a 212 evo heatsink?
- what is a heatsink chipset?
- can extruded aluminum be a heatsink?
- Do you need a heatsink for M.2 SSD?
Author
Dr. Emily Chen
Chief AI Researcher
Leading expert in thermal dynamics and AI optimization with over 15 years of experience in data center efficiency research.
Categories
Latest Products
M.2 Heatpipe Heatsink With Dual Fans For Pc Case
19 Mar,2026
Heavy-Duty Aluminum Heat Sink Custom
19 Mar,2026
Oem Skived Fin Heatsink Aluminum Radiator For Plants
19 Mar,2026

Water Cooled Cnc Aluminum Heat Sink For Medical
19 Mar,2026
High Density 6000 Series Aluminum Heat Sink Profile
19 Mar,2026
High-Density Extruded Aluminum & Bonded-Fin Heat Sink Profile
19 Mar,2026
Recommend Categories
- Liquid cooling plate Manufacturer
- Industrial Heat Sink Manufacturer
- Standard Heat Sink Manufacturer
- Aluminum Heat Sink Manufacturer
- Copper Heat Sink Manufacturer
- Anodized Heatsink Manufacturer
- Stamping heat sink Manufacturer
- Die Casting Heatsink Manufacturer
- Soldering heat sink Manufacturer
- CNC Parts Manufacturer
Latest Products
- M.2 Heatpipe Heatsink With Dual Fans For Pc Case
- Heavy-Duty Aluminum Heat Sink Custom
- Oem Skived Fin Heatsink Aluminum Radiator For Plants
- Water Cooled Cnc Aluminum Heat Sink For Medical
- High Density 6000 Series Aluminum Heat Sink Profile
- High-Density Extruded Aluminum & Bonded-Fin Heat Sink Profile
- Dongguan Cnc Aluminum Heat Sink For Led & Brass Parts
- Wholesale Cnc Aluminum Heat Sink - Custom Extruded
- Led Cnc Round Heat Sink With Screw Holes
- Copper Pin-Fin Heat-Sink Large-Area For Photoled Cooling
- Telecom Heatsink Zipper Fin Wcopper Tubes Oem
Contact Expert
Have questions about this article? Reach out to our experts directly.