How to Screw in a Processor Liquid Cooler?
Ready to take your CPU cooling to the next level? Installing a liquid cooler can seem tricky, but with the right approach, it’s a straightforward process.
To install a liquid cooler for your processor, it’s essential to mount it correctly. Proper installation ensures optimal cooling performance and prevents any damage to the components.
Let’s break down the steps to help you install your liquid cooler and ensure it runs smoothly.
What Tools Are Needed for Installation?
Before diving into the installation, let’s go over the tools you’ll need. Having the right tools makes the process quicker and more efficient.
The basic tools required for installing a liquid cooler include a screwdriver, thermal paste, and sometimes a mounting bracket specific to your cooler and CPU socket.
Here’s a detailed look at what you’ll need for a smooth installation:
1. Screwdriver
A small, Phillips-head screwdriver is essential for installing the CPU block and securing the cooler into place. It’s always best to use a magnetic screwdriver to prevent screws from falling into your case.
2. Thermal Paste
Thermal paste is necessary for creating a thin layer between the CPU and the cooler’s CPU block. It helps with heat transfer by filling any microscopic gaps between the surfaces. Most coolers come with a small tube of paste, but you can buy separate thermal paste if necessary.
3. Mounting Bracket
Depending on the type of CPU cooler and motherboard socket, you may need a mounting bracket that fits your setup. Be sure to use the right bracket for your specific cooler model and socket type.
4. Cable Ties
For tidying up the cables and keeping them organized, you may want to have some cable ties or Velcro straps on hand.
Having all of these tools prepared before you begin installation will save you time and reduce the chances of missing something.
What Are the Benefits of Proper Mounting?
Proper mounting of the liquid cooler is crucial for several reasons. It affects both the cooling efficiency and the lifespan of your cooler and CPU. Here’s why it matters:
Correctly mounting the cooler maximizes heat transfer, minimizes noise, and helps your system run more efficiently, ensuring better performance over time.
1. Maximizing Heat Transfer
When you mount the CPU block, proper alignment ensures maximum contact with the CPU’s surface. This guarantees that the thermal paste can efficiently transfer heat from the CPU to the cooler’s block. A poor mount can result in hot spots, reduced cooling efficiency, and higher temperatures.
2. Minimizing Vibration and Noise
Improper installation can lead to cooler components vibrating, which might cause noise during operation. Mounting the cooler tightly and securely minimizes any vibrations and ensures a quieter system.
3. Extending Cooler and CPU Life
By ensuring proper installation, you help extend both the cooler’s and the CPU’s lifespan. Overheating from poor heat dissipation can shorten the life of your components, so a secure mount is key for long-term reliability.
4. Preventing Damage
A properly mounted cooler avoids putting pressure on delicate parts like the CPU or motherboard. Mounting it incorrectly could cause damage to these components, leading to costly repairs.
Proper mounting ensures that your cooler performs at its best and prevents long-term damage to your system.
How to Screw in the Cooler Step-by-Step?
Now that we know the tools and benefits, let’s dive into the step-by-step guide for screwing in your processor liquid cooler.
This step-by-step process will guide you through installing your cooler and securing it properly.
1. Prepare the Case and Cooler
- Step 1: Start by ensuring your case is clean and that you have plenty of space to work. Remove any components that might get in the way.
- Step 2: Lay the case flat on a work surface to make the installation easier. This will give you easy access to both the CPU socket and the area where you’ll mount the cooler.
2. Apply Thermal Paste
- Step 1: If your cooler doesn’t come with pre-applied thermal paste, you’ll need to apply it yourself. Place a small, pea-sized amount of thermal paste in the center of the CPU.
- Step 2: Be careful not to use too much paste, as it can spill over when the cooler is pressed down. Less is more in this case.
3. Install the Mounting Bracket
- Step 1: Depending on your cooler, you may need to install a mounting bracket onto the motherboard first. This bracket typically screws into the motherboard’s CPU socket.
- Step 2: Align the bracket with the mounting holes, making sure it is seated correctly before securing it with screws.
4. Align the CPU Block and Screw It In
- Step 1: Now, carefully align the CPU block with the mounting bracket and the CPU. The block should sit evenly on top of the CPU without any gaps.
- Step 2: Begin screwing the block into place by tightening the screws in a cross pattern to apply even pressure. Don’t over-tighten the screws, as this can cause damage to the cooler or motherboard.
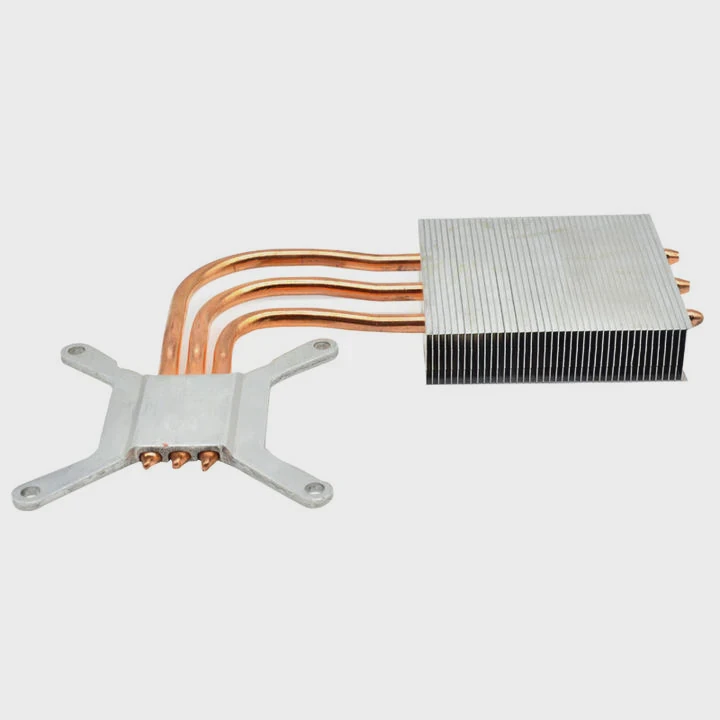
5. Install the Radiator
- Step 1: With the CPU block securely mounted, it’s time to install the radiator. Choose an appropriate location in your case (usually top or front) and secure the radiator with screws.
- Step 2: If your cooler has fans attached to the radiator, make sure the airflow direction is correct. Fans should either pull air into the case or push it out, depending on your case’s airflow design.
6. Connect the Pump and Fans
- Step 1: Plug the pump’s power cable into the CPU_FAN or AIO_PUMP header on the motherboard.
- Step 2: Connect the fans to the appropriate headers on the motherboard or fan controller, ensuring they are plugged into the correct slots for optimal performance.
7. Organize Cables and Check Everything
- Step 1: Use cable ties or Velcro straps to organize any cables, ensuring they don’t obstruct airflow or interfere with any components.
- Step 2: Double-check that all connections are secure, and there are no loose screws or cables.
8. Test the System
- Step 1: Once everything is in place, power on your system to test the cooler. Ensure that the fans are running and that the pump is circulating coolant properly.
- Step 2: Monitor your CPU temperatures to ensure the cooler is working efficiently.
What Are the Trends in CPU Cooler Installation Design?
CPU cooler designs are always evolving to keep up with new technologies and consumer demands. Here’s a look at some of the latest trends in CPU cooler installation.
Modern cooler designs are more efficient, quieter, and offer easier installation with improved aesthetics. Let’s explore these trends.
1. Tool-Free Installation
One of the most significant trends is tool-free installation. Many modern AIO coolers now come with mounting systems that require no tools to attach the CPU block and radiator. This makes the process faster and easier for both beginners and experienced users.
2. LCD Displays on CPU Blocks
Some high-end coolers now feature LCD screens on the CPU block. These screens can display temperature readings, system stats, and even customizable graphics. This not only improves the cooler’s functionality but also adds a sleek and modern look to your build.
3. RGB Lighting and Customization
RGB lighting is now a standard feature on many AIO liquid coolers. The fans and CPU block often feature customizable RGB lighting, allowing users to match their cooler with the overall aesthetic of their PC build. You can control the lighting through software, creating unique light patterns and colors to personalize your system.
4. Improved Pump Designs
Modern pumps are quieter and more efficient than ever before. They are designed to reduce vibrations and noise, providing better cooling with less sound. Some pumps now feature dual-chamber designs for improved coolant flow and noise reduction.
5. Larger Radiators
As gaming and workstation systems become more powerful, AIO coolers are evolving to meet the demands of higher-performance CPUs. Larger radiators (e.g., 360mm and 420mm) are becoming more common for handling the heat generated by overclocked or multi-core processors. These radiators offer more surface area, improving heat dissipation.
6. Improved Tubing and Fittings
The tubing used in AIO coolers is now more durable and flexible, reducing the chance of leaks or kinks. Some newer designs feature rotating fittings, allowing you to route the tubing in the most convenient way without worrying about twisting the hoses.
Conclusion
Properly screwing in and installing your processor liquid cooler is critical for ensuring your system runs cool and stable. With the right tools, following the correct steps, and understanding the latest trends, you can install your cooler with confidence and enjoy improved performance and reliability.
TAGS
Latest Articles

Volume discount levels for heat sink orders?
Buyers often ask when heat sink prices start to drop with volume. Many worry they’re overpaying for small orders. This guide explains how B2B volume pricing works for thermal components. Heat sink
21 Dec,2025
Heat sink long-term supply contract options?
Many buyers want stable pricing and reliable delivery for heat sinks. But without a clear contract, risks grow over time. This article explores how to secure better long-term supply deals. Long-term
21 Dec,2025
Tooling cost for new heat sink profiles?
Many engineers struggle to understand why tooling for custom heat sinks costs so much. They worry about budgeting and production timelines. This article breaks down the cost drivers behind tooling.
21 Dec,2025
Heat sink custom sample process steps?
Sometimes, starting a custom heat sink project feels overwhelming—too many steps, too many unknowns, and too many risks. You want a sample, but not endless delays. The process for requesting and
20 Dec,2025
Standard B2B terms for heat sink payments?
When buyers and sellers in B2B heat sink markets talk about payment, many don’t fully understand what’s standard. This can lead to delayed orders, miscommunication, and even lost business
20 Dec,2025
Heat sink pricing factors for large orders?
Heat sinks are vital for many systems. When prices rise, projects stall and budgets break. This problem can hit teams hard without warning. Large order heat sink pricing depends on many factors. You
20 Dec,2025Related Articles
- Why is a Liquid-Cooled System Pressurized?
- What is Mobile Liquid Cooling?
- Are Liquid-Cooled Computers Better?
- What is Liquid Cooling System in Mobile Devices?
- Is the Royal Enfield Super Meteor 650 Liquid Cooled?
- What Is a Liquid Cooling System for a Computer?
- Is Alienware Liquid Cooling Worth It?
- Which Phone Has a Liquid Cooling System?
- How to Check a Liquid Cooling System?
- Which Liquid Cools the Fastest?
- How Does a Liquid-Cooled Engine Work?
- What is Liquid Cooled?
Author
Dr. Emily Chen
Chief AI Researcher
Leading expert in thermal dynamics and AI optimization with over 15 years of experience in data center efficiency research.
Categories
Latest Products


Recommend Categories
- Liquid cooling plate Manufacturer
- Industrial Heat Sink Manufacturer
- Standard Heat Sink Manufacturer
- Aluminum Heat Sink Manufacturer
- Copper Heat Sink Manufacturer
- Anodized Heatsink Manufacturer
- Stamping heat sink Manufacturer
- Die Casting Heatsink Manufacturer
- Soldering heat sink Manufacturer
- CNC Parts Manufacturer
Latest Products
- Wholesale Aluminum Radiator
- Water Cooling Plate Kit
- Water Cooling Heat Sink
- Water Cooling Heat Sink Kit
- Stainless Steel Water Distributor
- Server Water Cooling Plate Kit
- Server Liquid Cooling System
- Server Aluminum Cooling Kit
- S19 Full Cover Cooling Plate
- S19 Cooling Plate Kit
- S19 Aluminum Cooling Plate
Contact Expert
Have questions about this article? Reach out to our experts directly.