how to install chipset heatsink?
I see many people face trouble when they install a chipset heatsink. I feel the same pain the first time I did it. The job looks simple, but small details often go wrong.
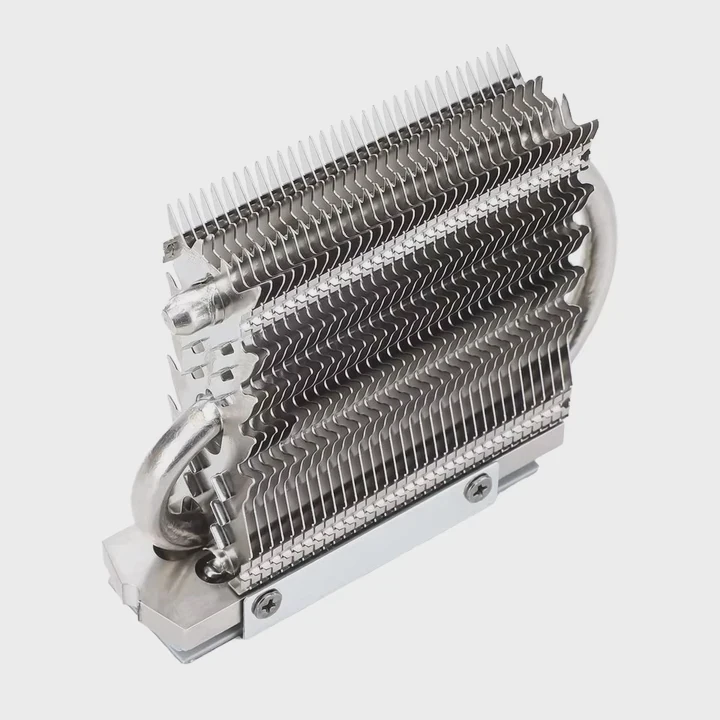
You can install a chipset heatsink by finding the chipset spot on the motherboard, removing the old pad, aligning the new sink, pressing it down, and locking the clips in place. This process keeps the chipset stable and cool.
I want to guide you step by step. I want you to feel clear, calm, and safe when you work on your board. I will show you the simple ideas that help the install work right every time.
Why identify chipset location first?
I meet many people who rush into the installation. They skip the first step. They do not confirm the chipset position. This mistake often leads to wrong pressure on parts near the chipset. It also leads to uneven cooling.
You should identify the chipset location first because the chipset needs direct contact with the heatsink, and a wrong position leads to poor cooling, weak contact, and possible board damage.
I always take time to inspect the motherboard. I check the print labels. I read the board manual. When I first worked with a very compact board, I thought the chipset was the small black square near the PCIe slot. I learned later that it was a power controller. This mistake taught me to slow down. It taught me to look at the pattern of parts. The chipset is often near the center of the board, or near the I/O area, and it often sits under a flat chip package.
How to locate the chipset on a board
I follow a few simple clues to confirm the spot:
- I look for the largest square IC near the board’s middle area.
- I check the chipset label printed on the PCB.
- I look for two small holes near the chip. These holes often hold the heatsink clips.
- I compare the board layout with the manual.
What changes when you locate the chipset early
When I confirm the chipset first, I stay in control. I know where the pressure must go. I know where the thermal pad should touch. I know which clips are meant for the sink. This clarity avoids mistakes.
Here is a simple table that shows the difference:
| Action | Result when chipset is found early | Result when chipset is not confirmed |
|---|---|---|
| Place thermal pad | Smooth and centered | Offset and weak |
| Apply pressure | Even and safe | Risk of board strain |
| Attach clips | Fits correct holes | Clips may not lock |
When I skip this step, I waste time. I redo the install. My pad shifts. My contact becomes poor. So now I always start with identification. It makes my work clean and simple.
Which clips secure chipset sinks?
Many people feel confused when they see different clip styles. Some boards use metal hooks. Some use plastic push pins. Others use spring clips. When I installed my first chipset sink with push pins, I fought with them for 20 minutes. They kept bouncing back. I learned later that I did not press them straight.
Chipset heatsinks are secured by push pins, spring clips, or metal hooks, and the right clip must match the motherboard holes to lock the sink in place with firm pressure.

When I choose a heatsink, I always check the type of clip it uses. I check the hole spacing on the board. I check the pin diameter. I check the spring tension. These simple checks let me avoid mismatch.
Common clip types you will see
I often explain the three common clip types:
Plastic push pins:
These pins expand when pressed. They lock into the board holes. They are easy to use when you push straight from the top.Spring clips:
These clips hold the sink with tension. They connect to two hooks on the board. They apply stable pressure.Metal hook clips:
These clips grab onto small latches near the chipset. They hold the sink with a metal arm.
How to know which clip is correct
I use a simple approach:
- I measure the spacing between the board holes.
- I check the diameter of the clip legs.
- I check the sink base for small hooks or notches.
- I test-fit the clip lightly without pressure.
If the clip matches, it fits with no fight. If it does not match, it wiggles, or it will not sit. I never force it. Forcing a clip often leads to cracks in the PCB.
Here is a small table to help you compare:
| Clip Type | Strength | Easy to Install | Best Use |
|---|---|---|---|
| Push pins | Medium | Yes | Consumer boards |
| Spring clips | High | Moderate | Performance boards |
| Metal hooks | Medium | Moderate | Older chipsets |
When I know the clip type, I feel confident. The install becomes simple. The contact becomes firm. The cooling improves.
Can pads misalign easily?
When I worked on tight boards, I saw pads shift again and again. The pad sticks to my finger. It drifts when I lower the sink. It slides when I press too fast. I wasted many pads in early days. This made me rethink my method.
Thermal pads can misalign easily because they are soft, sticky, and sensitive to pressure, so they require slow placement, light support, and a careful sink drop to stay centered.
I learned that the pad moves when the sink does not drop straight. If you tilt the sink, the pad shifts. If you press too fast, the pad folds. So now I use a slow and steady process.
Why pads shift more than paste
Pads shift because their texture is soft. They grip surfaces. They stretch. Paste spreads, but pads drag. This makes pads more likely to move off-center.
I also see pads change shape with small pressure. This means you must handle them with care.
How I keep the pad stable
I use a few simple habits:
- I clean the chipset surface first.
- I hold the pad by the edges.
- I place the pad straight on top of the chip.
- I tap it lightly to seat it.
- I drop the sink straight from above.
- I avoid sliding motions.
What happens when pads misalign
When a pad shifts, the sink no longer sits flat. The contact becomes weak. The cooling drops. The chipset gets hot. I saw a board throttle hard because the pad moved just a few millimeters. That moment taught me to never rush the pad step.
Pad thickness and movement
Pad thickness also changes the behavior:
- Thin pads shift less.
- Thick pads shift more.
- Soft pads stretch more.
- Firm pads hold shape better.
This simple idea helps me choose the right pad. Soft and thick pads fit uneven surfaces but need more care. Thin pads fit flat chips with ease.
Should airflow support chipset cooling?
When I installed a great sink but still saw high chipset temps, I knew something was missing. I learned that the sink alone does not finish the job. Airflow decides if the heat escapes or stays.
Yes, airflow should support chipset cooling because the heatsink only spreads heat, and steady airflow pushes the heat away, keeps the chipset temperature low, and improves system stability.
Chipset sinks are often small. They rely on case fans. When airflow is weak, the heat stays around the sink. The temperature climbs. When airflow moves well, the sink works better.
Why airflow matters so much
Air moves heat away. Without air movement, even the best heatsink warms up. Chipset areas sit near GPUs and drives. These parts add more heat. Airflow helps clear this pocket of warm air.
How I improve airflow around the chipset
I follow simple steps:
- I check the front intake fan speed.
- I check that cables do not block the chipset zone.
- I check that the GPU backplate does not sit too close.
- I add a small fan if the case design allows.
- I keep dust filters clean.
These small habits make the chipset area cooler. A 5°C drop is common. Sometimes I see 10°C.
Airflow layout makes a difference
Here are three airflow patterns I often see:
- Front-to-back flow:
Simple and good for most builds.
- Bottom-to-top flow:
Better for compact or vertical cases.
- Side intake flow:
Good for GPU-heavy systems.
I choose the layout based on the case. I avoid mixing patterns. I prefer a clean, steady direction.
Airflow mistakes I avoid
I see people place fans in opposite directions. I see cables block vents. I see dust build up on grills. I avoid all of these. Clean airflow makes the sink work well.
Conclusion
Chipset heatsink installation becomes simple when I know the chipset location, match the right clips, center the pad, and support the sink with clean airflow. These steps keep the chipset safe and cool.
TAGS
Latest Articles

Volume discount levels for heat sink orders?
Buyers often ask when heat sink prices start to drop with volume. Many worry they’re overpaying for small orders. This guide explains how B2B volume pricing works for thermal components. Heat sink
21 Dec,2025
Heat sink long-term supply contract options?
Many buyers want stable pricing and reliable delivery for heat sinks. But without a clear contract, risks grow over time. This article explores how to secure better long-term supply deals. Long-term
21 Dec,2025
Tooling cost for new heat sink profiles?
Many engineers struggle to understand why tooling for custom heat sinks costs so much. They worry about budgeting and production timelines. This article breaks down the cost drivers behind tooling.
21 Dec,2025
Heat sink custom sample process steps?
Sometimes, starting a custom heat sink project feels overwhelming—too many steps, too many unknowns, and too many risks. You want a sample, but not endless delays. The process for requesting and
20 Dec,2025
Standard B2B terms for heat sink payments?
When buyers and sellers in B2B heat sink markets talk about payment, many don’t fully understand what’s standard. This can lead to delayed orders, miscommunication, and even lost business
20 Dec,2025
Heat sink pricing factors for large orders?
Heat sinks are vital for many systems. When prices rise, projects stall and budgets break. This problem can hit teams hard without warning. Large order heat sink pricing depends on many factors. You
20 Dec,2025Related Articles
- do you need to put thermal past when changing heatsinks?
- how to remove a processor and heatsink from motherboard?
- should you replace stock heatsink?
- How to reapply Intel heatsink Ivy Bridge?
- Does LED strip need heatsink?
- how long does heatsinks last on gaming pcs?
- what heatsinks fit evga z390 dark?
- does the ssd need a heatsink?
- do you need a heatsink for m 2?
- can a cpu run without a heatsink?
- how to install raspberry pi 4 heatsink?
- how to install an amd 3700x heatsink?
Author
Dr. Emily Chen
Chief AI Researcher
Leading expert in thermal dynamics and AI optimization with over 15 years of experience in data center efficiency research.
Categories
Latest Products
M.2 Heatpipe Heatsink With Dual Fans For Pc Case
19 Mar,2026
Heavy-Duty Aluminum Heat Sink Custom
19 Mar,2026
Oem Skived Fin Heatsink Aluminum Radiator For Plants
19 Mar,2026

Water Cooled Cnc Aluminum Heat Sink For Medical
19 Mar,2026
High Density 6000 Series Aluminum Heat Sink Profile
19 Mar,2026
High-Density Extruded Aluminum & Bonded-Fin Heat Sink Profile
19 Mar,2026
Recommend Categories
- Liquid cooling plate Manufacturer
- Industrial Heat Sink Manufacturer
- Standard Heat Sink Manufacturer
- Aluminum Heat Sink Manufacturer
- Copper Heat Sink Manufacturer
- Anodized Heatsink Manufacturer
- Stamping heat sink Manufacturer
- Die Casting Heatsink Manufacturer
- Soldering heat sink Manufacturer
- CNC Parts Manufacturer
Latest Products
- M.2 Heatpipe Heatsink With Dual Fans For Pc Case
- Heavy-Duty Aluminum Heat Sink Custom
- Oem Skived Fin Heatsink Aluminum Radiator For Plants
- Water Cooled Cnc Aluminum Heat Sink For Medical
- High Density 6000 Series Aluminum Heat Sink Profile
- High-Density Extruded Aluminum & Bonded-Fin Heat Sink Profile
- Dongguan Cnc Aluminum Heat Sink For Led & Brass Parts
- Wholesale Cnc Aluminum Heat Sink - Custom Extruded
- Led Cnc Round Heat Sink With Screw Holes
- Copper Pin-Fin Heat-Sink Large-Area For Photoled Cooling
- Telecom Heatsink Zipper Fin Wcopper Tubes Oem
Contact Expert
Have questions about this article? Reach out to our experts directly.